Showing posts with label Chocolate. Show all posts

Saturday, March 2, 2013

Happy 6th Birthday Cake!


My youngest grandson will be 6 on Tuesday, but there’s a party tomorrow! Devon, plus seven friends, plus his big brother and his friend, plus Mom, Dad and possibly other parents. You know how it goes.

I’m lucky ‘cause I get to make the cakes each year for the boys. One of the cakes, that is. Mom provides a small cake for the four of them to celebrate. Then there are individual cakes for a party each with their friends. Then one more cake--a bigger one, for a celebration of both birthdays with extended family. I’ll bet you’ve done that, too!

After ten years of birthday cakes and crazy themes, I headed them off at the pass this year. Devon, I asked, what kind of cake do you want? Marbled white and chocolate. That’s easy enough. What colors do you like, Devon? Red, not too dark. Green and blue. Okay, now to combine that with my idea of a “6” for his sixth birthday.


I’m not going to supply any cake recipe, nor will I give you my favorite icing recipe. Simply use a cake recipe you like. The same goes for the icing. It doesn’t matter.
Don’t bother worrying too much about how to make the number look perfect (I did!). When you frost the cake, you’ll cover all the problem areas and the finished cake will look wonderful.


The cake is topped with red, green and blue chocolate pieces and curls. I got the idea from my blogger friend Sibella, at Baking With Sibella, who used them on her beautiful Valentine’s cake. She, in turn, told of finding the idea at one of my new favorite blogs, The Pioneer Woman.


This last picture isn’t quite true to color, but I wanted to include it to show you the black squiggles I added at the last minute. And here’s why... I went shopping with Devon’s mom, my daughter, yesterday to pick up last minute items for the party. She’s sometimes a last minute kind of gal. In this case, she wandered the dollar store and finally decided on a pirate theme.

Oh, great, I fixed a “6” cake with red, green and blue chocolate curls. Nothing too pirate-like about that! Then I remember I had a tube of black decorating gel. I think it looks more pirate-like now... Argh!


Monday, November 26, 2012

Frosted Chocolate Cranberry Muffins with Grand Marnier

Muffins or cupcakes? They started out as plain muffins, until I took creative license and added cocoa, cranberries, pecans and Grand Marnier.

Coming out of the oven, these beauties cried out for more dark, creamy goodness, so I dipped them in melted chocolate and zig-zagged them with a decorating gel.

The end result was heavenly to look at and heavenly to bite into!


(The added ingredients, the ones which take them beyond the basic muffin, are in italics.)

CHOCOLATE CRANBERRY MUFFINS WITH GRAND MARNIER
(Makes 12 muffins)

Ingredients....

3/4 cup unbleached white flour
3/4 cup unbleached whole wheat flour
3/4 cup brown sugar
3 tablespoons cocoa powder
1 teaspoon baking soda
1 teaspoon baking powder
1/4 teaspoon salt
1-1/2 cups raw cranberries, cut in half
2/3 cups milk
1/4 cup vegetable oil
1 egg
1-1/2 tablespoons Grand Marnier (orange-flavored cognac-based liqueur)
2/3 cup chopped nuts
1-1/2 cups dark chocolate candy wafers
3.5 ounce (99 g) tube of Wilton Sparkle Gel


Directions...

1. Preheat oven to 350-degrees Fahrenheit.
2. Mix dry ingredients.
3. Take raw cranberries out of the freezer and thaw for about five minutes before cutting in half. Stir into dry ingredients.
4. In small bowl, combine milk, oil, egg and Grand Marnier. Make a “well” in the center of the dry ingredients, add wet ingredients and stir just until mixed, no longer.
5. Gently fold in nuts.
6. Pour into prepared muffin tin (greased or oiled). Don’t use cupcake papers.
7. Bake in pre-heated oven 20 to 25 minutes.
8. When thoroughly cooled, dip top of each muffin in melted chocolate. Let set for a couple of minutes, then decorate with the Sparkle Gel.


Sometimes these ideas pop into my head in the evening when I really have a desire to cook but don’t want to heat the oven and wait for the finished product to cool. In this case, I mixed the muffin batter, greased the muffin tin and poured in the batter, covered the whole thing in plastic wrap and refrigerated it. In the morning, I took the muffin tin out of the refrigerator, uncovered it and let it sit on the counter while the oven preheated.

Thursday, May 17, 2012

Strawberry S'mores

What did I go to Walmart for? I can’t remember but I did end up wandering down an aisle with displays of graham crackers, chocolate bars and marshmallows. One of each item went into my shopping cart. After all, who doesn’t salivate at the thought of melty s’mores.

After supper I walked over the river to Wegmans (No, I don't walk on water; I used the bridge.) and just inside the front doors were the biggest, most beautiful strawberries I’d seen in months. Only $3.49 for two pounds.
Two pounds is a lot of strawberries for one person to eat, unless quite a few get frozen.

When I prepared to make microwave s’mores, I thought of the strawberries and decided to experiment.

I washed and dried a couple of strawberries, cut out the leaves and then sliced the fruit.

For my first attempt, I placed 3 strawberry slices on each of two graham cracker squares and topped each with a piece of chocolate and a marshmallow. The chocolate melted, the marshmallow got huge but didn’t melt or squish or anything, not even when I took it out of the microwave and placed another graham crackers on top of each.

Second try, I got it right by making the s’mores the usual way: one graham cracker square, one small piece of chocolate, one large marshmallow, in that order.

Microwaved them for 12-15 seconds, removed from the microwave, topped the marshmallow (which puffed beautifully and expanded itself to the sides) with three rosy-red strawberry slices, and finally topped it all with another graham cracker square.


******

LIKE Step by Step in the Kitchen on Facebook. I'll be posting extra notes and photos there.

******

Your comments are always welcome here!

Tuesday, March 13, 2012

Eating out ~ Part 2 ~ AND Raspberry Pie Muffins


In my February 28, 2012 blog entry, Eating Out, I wrote about my two-week visit with my son in the Washington D.C./Baltimore MD area. We typically eat out a great deal when I visit and this time was no exception.

To keep the blog from stretching for miles, I only wrote about half of our travels and today I want to take you along on the rest of my journey.


Red Hot & Blue...

When my son was stationed in that area about fifteen years ago, he frequented Red Hot & Blue, a franchise barbecue establishment. “Barbeque, Burgers & Blues” to be exact. I don’t ever remember eating at a barbeque joint before that moment, but this was definitely a memorable occasion.

My meal sounds simple ~ Pulled Chicken Salad. Think whole chicken with bones and skin, marinated and roasted. Then, the bones and skin are removed and the meat is pulled into strips. My salad was huge, loaded with veggies and the pulled chicken piled high. Fit for a teenaged boy! Worthy of three meals for me. I took more than half home.

A side order of Hush Puppies took me back to Florida memory heaven. Haven’t had HPs in probably thirty years. Loaded with bits of onion and deep fried. They were worth the heartburn that followed later that evening.


The Spice & Tea Exchange...

Spices, teas, seasonings ~ all packaged and mixed on-site. Buy whatever quantity you want and the prices are reasonable. The Spice & Tea Exchange of Annapolis said I could order online, too. Didn’t realize it was a franchise until later in our conversations with the owners.

I came home with whole cloves, coconut thai rub and raspberry sugar. Today’s blog entry features (further on) a recipe using the raspberry sugar.


Mamma Roma Italian Restaurant & Pizza...

In the second week of my visit, son asked me to come up with some ideas for eating out. I checked online, of course, and we finally settled on Mamma Roma.

My order of fettuccine with marinara and lots of vegetables ~ roasted red peppers, green pepper strips, onions, zucchini ~ was huge! Again, a meal fit for a teenaged boy, but providing several leftover meals for me. Delizioso!

Follow-up... Thanks to Mamma Roma for emailing me the name of my fettuccine dish. It's called FETTUCCINE BOSCAIOLA!


It’Sugar...

I felt like a kid in a candy store! Located in Baltimore’s Inner Harbor, It’Sugar reminded me of when I was a kid and went to a neighborhood Mom&Pop’s store to buy a bagful of candy for a nickel. Candies galore, serve yourself, and pay close attention to the pricing.


Chocolate Chocolate...

A week before I set out on vacation, I read about the Frances and Ginger Park, authors and entrepreneurs. Frances and Ginger own a tiny, highly popular shop on Connecticut Avenue in Washington D.C. Chocolate Chocolate chocolates include every type of chocolate candy imaginable, carefully selected from candy creators around the world.


Son and I visited the shop (easily accessible by car or Metro), met the personable Park sisters and their store manager Koomo, and had a yummy time tasting and hearing about the origin of each candy we chose.

*********************

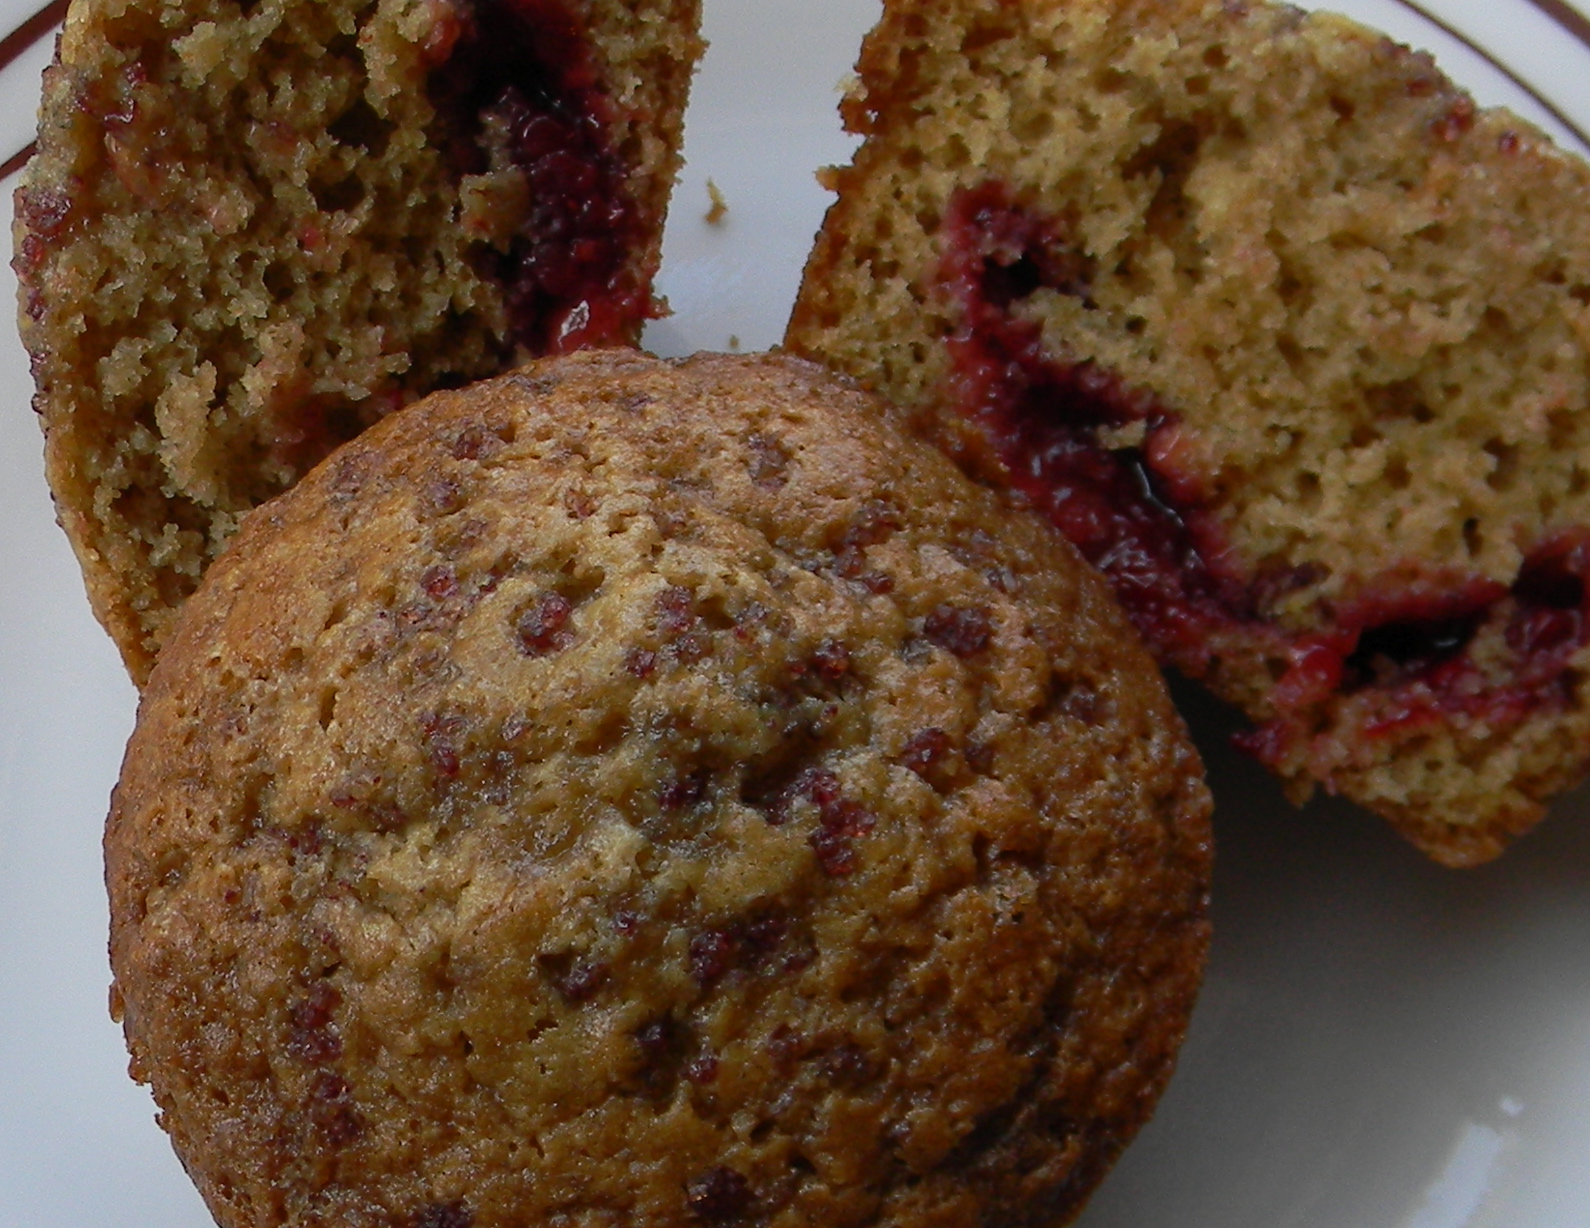
RASPBERRY PIE MUFFINS

The following is my basic recipe for 12 muffins. Use your imagination when it comes to adding ingredients or try some from my list below.

Muffins...

3/4 cup each unbleached white flour and unbleached whole wheat flour
3/4 cup brown sugar
1 teaspoon each baking soda and baking powder
1/4 teaspoon salt

Mix dry ingredients using fingers if necessary to remove any lumps from the brown sugar.

Make a well in the center of the dry ingredients and stir in...
2/3 cup milk
1/4 cup oil
1 egg.

Stir just until mixed, no longer.

Pour into prepared muffin tins (greased or oiled).

Bake in pre-heated oven 20 to 25 minutes.

For RASPBERRY PIE MUFFINS I made the following changes and additions...

*I changed the flour ratio to 1 cup white and 1/2 cup whole wheat

*I had Half’n’Half left over from another recipe, so I used it in place of milk.

*I placed 1 Tablespoon of Chambord French Black Raspberry Liqueur (which I found in a tiny bottle for under $5 at Bottles & Corks) in a liquid measuring cup, then added Half’n’Half up to the 2/3 cup line.

*After scooping about a tablespoon of batter into each muffin space (using half the batter), I placed a scant tablespoon (or a heaping teaspoon?)of Raspberry Pie Filling on each. Then topped each with the rest of the batter.

*Sprinkled each with Raspberry Sugar which I purchased in Maryland at The Spice & Tea Exchange. I had tried the sugar in two previous variations of this recipe, but sprinkled it on after baking which meant some of it missed the muffin and rolled onto the pan to melt. Take your pick and do it either way.


The basic muffins are delicious plain or you can add any one of the following...
1. Banana, cut up, and 1/2 teaspoon cinnamon
2. Raw cranberries, whole or chopped
3. Chopped uncooked rhubarb
4. Peach, chopped and mixed with a bit of lemon juice
5. Apple, chopped, and 1/2 teaspoon cinnamon
6. Raisins
7. Chocolate chips, regular or mini
8. Vegetables such as grated carrots, yams, or sweet potatoes


******
Step by Step in the Kitchen is on Facebook. Take a look and "Like" the page. I'll be posting extra notes and photos there.

******

I really love to hear from readers, to know what you think of my blog and my recipes.

What do you like to add to homemade muffins?

Wednesday, November 23, 2011

PIE CRUST PREP ~ Part 2


My previous entry went through the steps leading up to forming uncooked pie dough in disc shapes, wrapping them in plastic and aluminum foil, and then freezing them for Thanksgiving and Christmas.

Today, the day before Thanksgiving, I pulled out two discs to make pie shells for pumpkin pie. I actually let them thaw in the refrigerator all night, then removed them from the frig about twenty minutes before I used them. One thing I now know, having made the pies, is that the dough would have rolled better if I’d added maybe another teaspoon or two of water. They didn’t roll quite as thin as I would have liked, but having tasted it cooked -- a small piece broke off -- I can tell it’s going to be flaky and yummy.


You can see in the photo above, and in the next three photos, that there are tiny bits of shortening and bigger pieces of butter throughout the disc. That’s what makes the pie crust flaky.

I used my Wilton Roll & Cut Mat and love that it has circles on it going out inch by inch. I usually turn my pan pan upside down then add 2-3 inches to the measurement and that’s the diameter for my dough circle.


After sprinkling flour on the mat, the rolling pin and the disc, I roll the dough beyond the circle size I want, then trim it off. Believe me when I say, these circles never roll out to a perfect configuration (Does this word work here? I like the sound of it.). After carefully loosening the circle with a spatula, the choices are to fold it into quarters or roll it around the rolling pin.


It easy to see in this picture that the dough could have been thinner. I stopped at that thickness because it didn’t want to hold together if I pressed it any further. By the way, rolling dough calls for light pressure. Don’t lean into it.

To make repairs in the uncooked pastry dough, rub a tiny bit of cold water on the part of the pie to which you are going to add a "patch".

After placing the rolled out pastry in a pie pan, gently manipulate it to fit. Don’t stretch it. Trim it off to 1/4 to 1/2 inch overhang. Tuck under the excess. Gently press down around the edge with index fingers.


Now that the pastry is ready, cover it with plastic wrap and place the pan back in the refrigerator while you prepare the filling. Follow baking directions according to whatever pie you are making.

If you have any leftover dough, leave it in whatever shape it is when you cut it off the circle. Sprinkle with cinnamon sugar and bake on a cookie sheet in the oven till nicely browned. My mother used to do this. I don't remember any of her pies, but I do remember the pieces of pastry sprinkle and baked with cinnamon sugar. It's been a while since I've done this myself, but I think it will take about 10-15 minutes. Remember, sprinkle the cinnamon sugar on the dough before you put it on the cookie sheet. Otherwise, it will probably burn onto the pan and you'll have a mess to scrub off.


My pies are Pumpkins and Chocolate Pumpkin.

Happy Thanksgiving!


******

Step by Step in the Kitchen is now on Facebook. Take a look and "Like" the page. I'll be posting extra notes and photos there.

and

Visit my other blog ~ Corning NY Step by Step, a pictorial view of the City of Corning NY.