Showing posts with label pie. Show all posts

Thursday, May 9, 2013

Dairy-Free Tofu Pumpkin Pie, Vegan Gingerbread, and Scrambled Tofu


Many, many years ago (shhh... almost twenty!), I attended a vegetarian Thanksgiving potluck supper where someone brought one of the most delicious pumpkin pies I’ve ever tasted (before or since). Not an egg in sight in this creamy smooth pie, but everything else you’d expect to replicate this holiday favorite.

The great thing about tofu is that although its pretty tasteless on its own, tofu takes on the taste of whatever you mix it with. You can also match the texture of your dish by using the right tofu. In this case, since I wanted an exceptionally smooth and soft filling, I selected a firm silken tofu from Mori Nu. Unlike other tofus, silken does not require refrigeration before opening.

So... pumpkin pie made with tofu in place of eggs is silky smooth and tastes like pumpkin seasoned with ginger, cinnamon, nutmeg and cloves.

Oh, and another notable difference is the use of a store-bought graham cracker crust which, if made with margarine, is considered vegan.


DAIRY-FREE TOFU PUMPKIN PIE is best baked, cooled and chilled the day before it is to be used.

Mix in a food processor or blender until smooth:


16 oz. firm silken tofu*
16 oz. pumpkin
1 tsp. each ginger/cinnamon
1/2 tsp. salt
1/4 tsp. each ground nutmeg/cloves
3/4 cup light brown sugar
1/3 cup vegetable oil

Pour into graham cracker crust (store-bought crusts are made with margarine**). If you make it at home and want dairy-free, don’t use butter.


Bake one hour at 350 degrees Fahrenheit; will set more as it cools

* Mori Nu firm silken tofu usually comes in a 12.3 oz. container, so you’ll need to buy two and measure (weigh) to get the correct amount. The canned pumpkin that I used was Libby’s Pumpkin Filling - 15 oz. My advice would be to use the 15 oz. and only add 15 ounces of tofu, but add the other ingredients in the amounts listed.

** Since this recipe is almost twenty years old, I don’t know if this fact still holds true.


I’ve made this pie many times. This time I used a reduced fat crust and reduced fat whipped topping. I’ve made a note for future reference to stick to full fat next time I make DAIRY-FREE TOFU PUMPKIN PIE. For those who are vegan or simply eating dairy-free, remember that whipped toppings contain milk. Instead try one made with coconut milk, such as this one at Kitchen Simplicity.


************


What to do with leftover silken tofu...

After you make the pie, there will be leftover tofu! I put on my thinking cap and came up with the idea of using a gingerbread mix which, for some reason or other, I bought on sale one day. It called for the addition of one egg and some water.

I decided to substitute 1/4 cup of the silken tofu for the egg and the gingerbread cooked beautifully and tasted very good. Again, I had the whipped topping to serve with it.


Still had leftover tofu...

For scrambled tofu (instead of scrambled eggs), I mixed about 1/4 cup of the tofu with sautéed chopped scallions and tomatoes, then cooked it some more. Added salt and pepper, and then topped with shredded cheese. If I’d had some nutritional yeast, I would have mixed in a couple of teaspoons worth for added color and a more buttery taste.


And that was the end of the tofu.


Wednesday, April 24, 2013

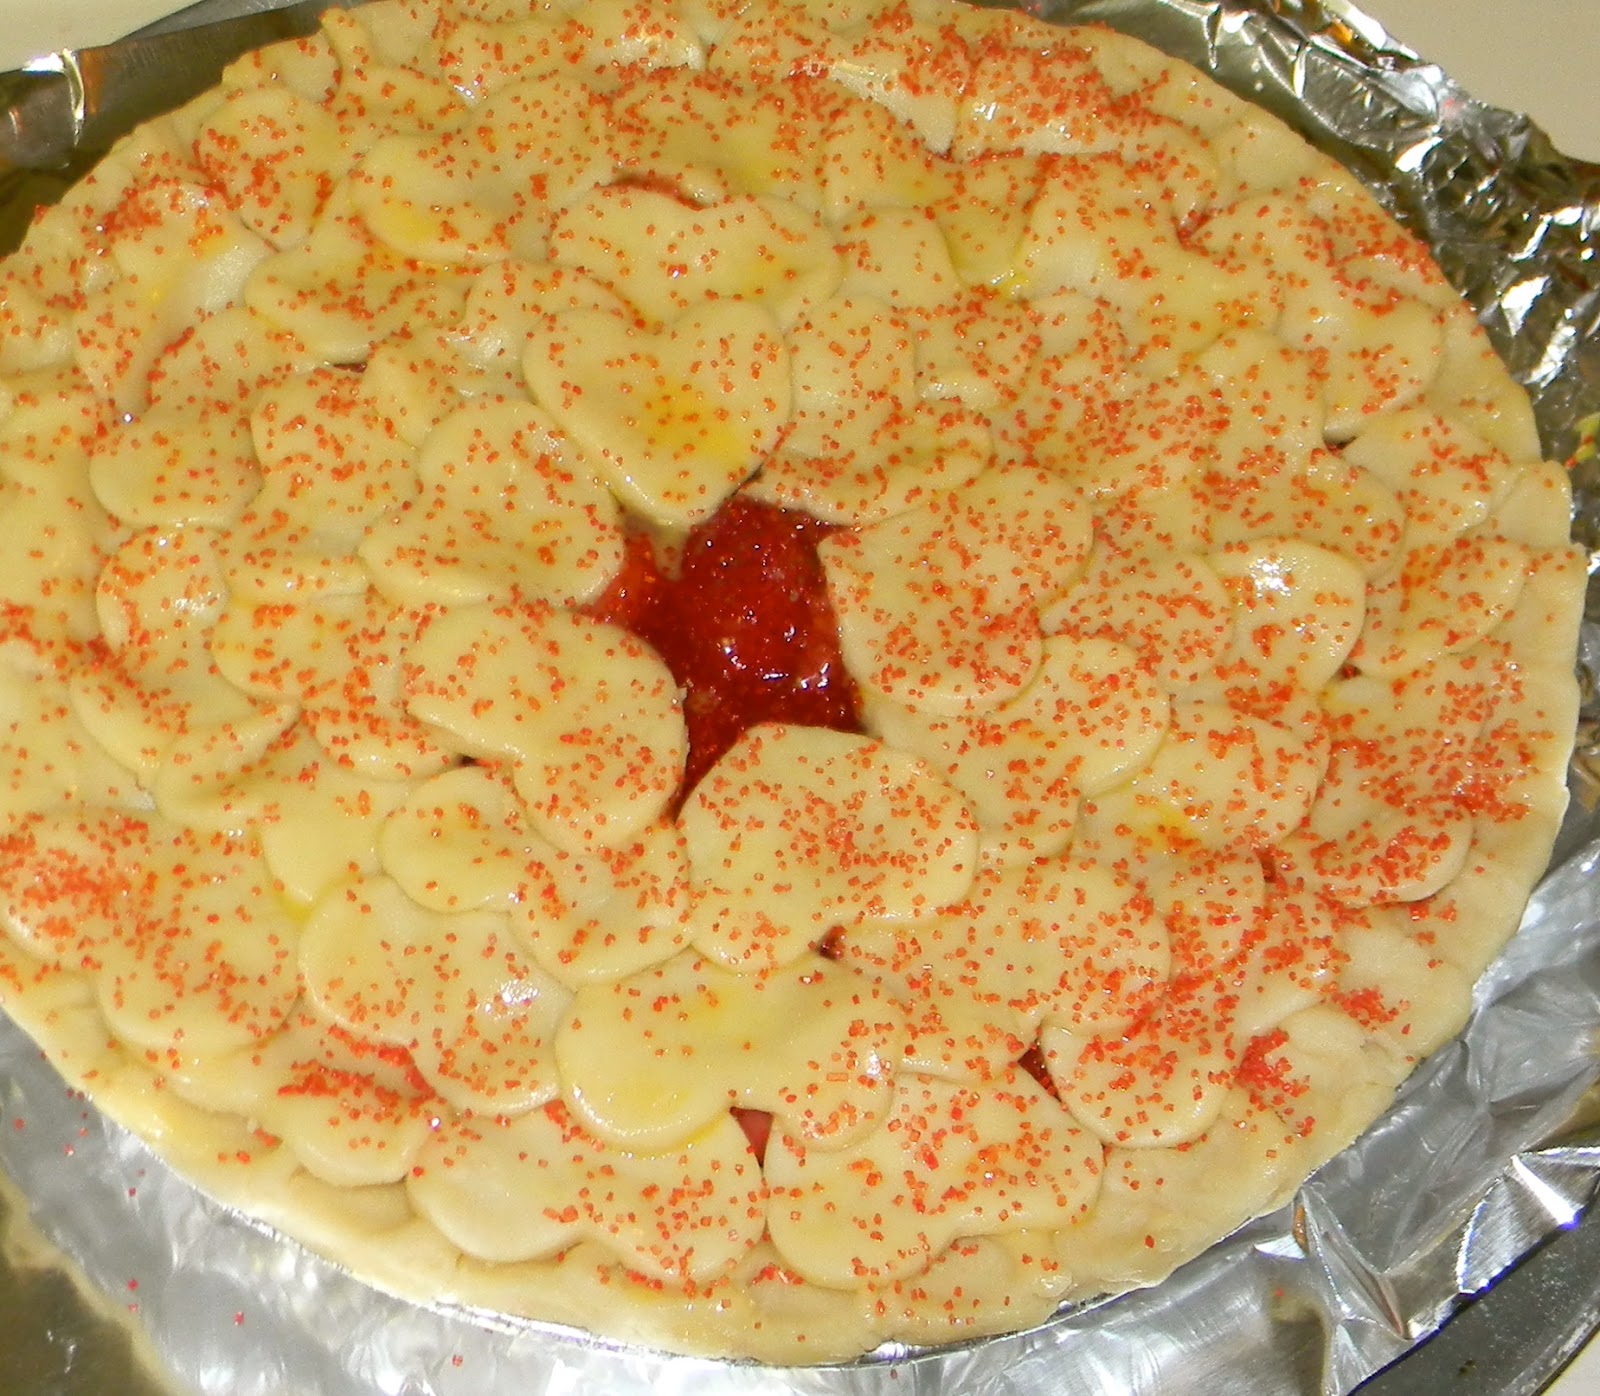
The Perfect Pie Crust For A Strawberry Heart Pie


I may have missed out in the past, but nevermore! This is THE pie crust recipe. Absolutely spot-on perfect ~ tender and flaky! And the simple strawberry filling... delicious! Just right especially for spring when strawberries are ready for picking and if you don’t pick your own, the stores have them at the best prices of the year.

Ree Drummond who writes The Pioneer Woman blog, received the PERFECT PIE CRUST from one of her readers, Sylvia L, who admits that this recipe has been around for a long, long time and she can’t remember where she originally got it. I know I’ve seen this recipe, or a variation of it, in past years, but I never tried it because I was turned off by the idea of adding vinegar and an egg. (My pie crust typically consists of flour, salt, butter and water.)


You won’t believe my first experience making this crust yesterday when I wanted something other than the store-bought crusts suggested in Miss Buttercup’s STRAWBERRY HEART PIE.

Because my hands are slightly arthritic, I now use a Kitchen Aid mixer and Hamilton Beach food processor for many of my cooking projects, such as bread and pie making.

So, I chose to mix my pie crust with the HB food processor. Let me make it clear that I’m an old-time pie maker--keep every ingredient cold, as little handling of the dough with (warm) hands as possible and work quickly.

As you will see when you look at the recipe, there is little opportunity to keep the pie dough cold during the mixing process, unless you count the addition of the cold water. I’m used to using cold, hard butter and water kept cold by adding ice cubes.

You’ll find the recipe with detailed instructions at The Pioneer Woman. Meantime, I’m going to give you a play by play of my experiences and hints for successful preparation of the PERFECT PIE CRUST...


1. Step One is to mix the Crisco vegetable shortening and flour. Here’s where it seemed to go wrong for me. A few pulses with the food processor should have given me a mixture resembling “a coarse meal”. Instead, the dough looked like a huge ball of glue and I couldn’t imagine adding any more liquids.

2. I persevered, using a few more quick pulses to stir in the beaten egg, cold water, vinegar and salt. Glue, even more gooey.

3. Removing the mixture from the food processor revealed that the dough wasn’t quite as gooey as it had appeared, but still way softer than any pie dough I’d ever prepared.


4. I used digital kitchen scales to measure out three equal portions. All three “discs” went into plastic bags, one being labeled and frozen. The other two were refrigerated because it would be several hours before I needed them.


5. Don’t be afraid to use enough flour to keep things from sticking, ‘cause this is a much stickier dough than most.

6. I don’t recommend rolling flattened dough around the rolling pin to transfer it to the pie pan. Mine stuck to itself and I had to start over. Decidedly annoying.

7. Bottom crust in pan, covered with plastic wrap. Refrigerate again, while cutting out hearts. Meantime, the filling is made and cooling to at least room temperature.

8. See No. 4 below about cutting out hearts.

As for Miss Buttercup’s STRAWBERRY HEART PIE, the recipe is pretty straight forward...

1. For my 9” pie, I chose to use four cups of strawberries (measured after cutting into chunks). Next time I’ll use at least five. If I use a 10” pan, I’ll use six cups, and don’t worry, the pie crust will work for this larger size, too.


2. Out of my four heart cookie cutters, I chose the next to the smallest, trying to match what’s in Miss Buttercup’s picture. She probably used the smallest one. She has more patience than me.


3. The recipe calls for one egg yolk for an egg wash that was applied to both sides of each heart. I used the whole egg and had more than enough to complete that task.

4. Whether you freeze or simply refrigerate your dough to chill it (a MUST!), I suggest taking only one-third or one-half the disc out of the frig at a time when making the hearts. When this dough warms, it’s not easy to handle the hearts without destroying them.


5. About the sanding sugar: I had colored decorating sugar (which is slightly larger grains than regular granulated sugar) and thought it would be pretty to use the red. It is pretty, but I probably won’t use a colored sugar again because it distracts (or is it detracts?!) from the heart shapes.

So, there you have it. An absolutely beautiful, tasty PERFECT PIE CRUST and a STRAWBERRY HEART PIE. This recipe is definitely a keeper and I can’t imagine ever using another pie crust recipe.


************


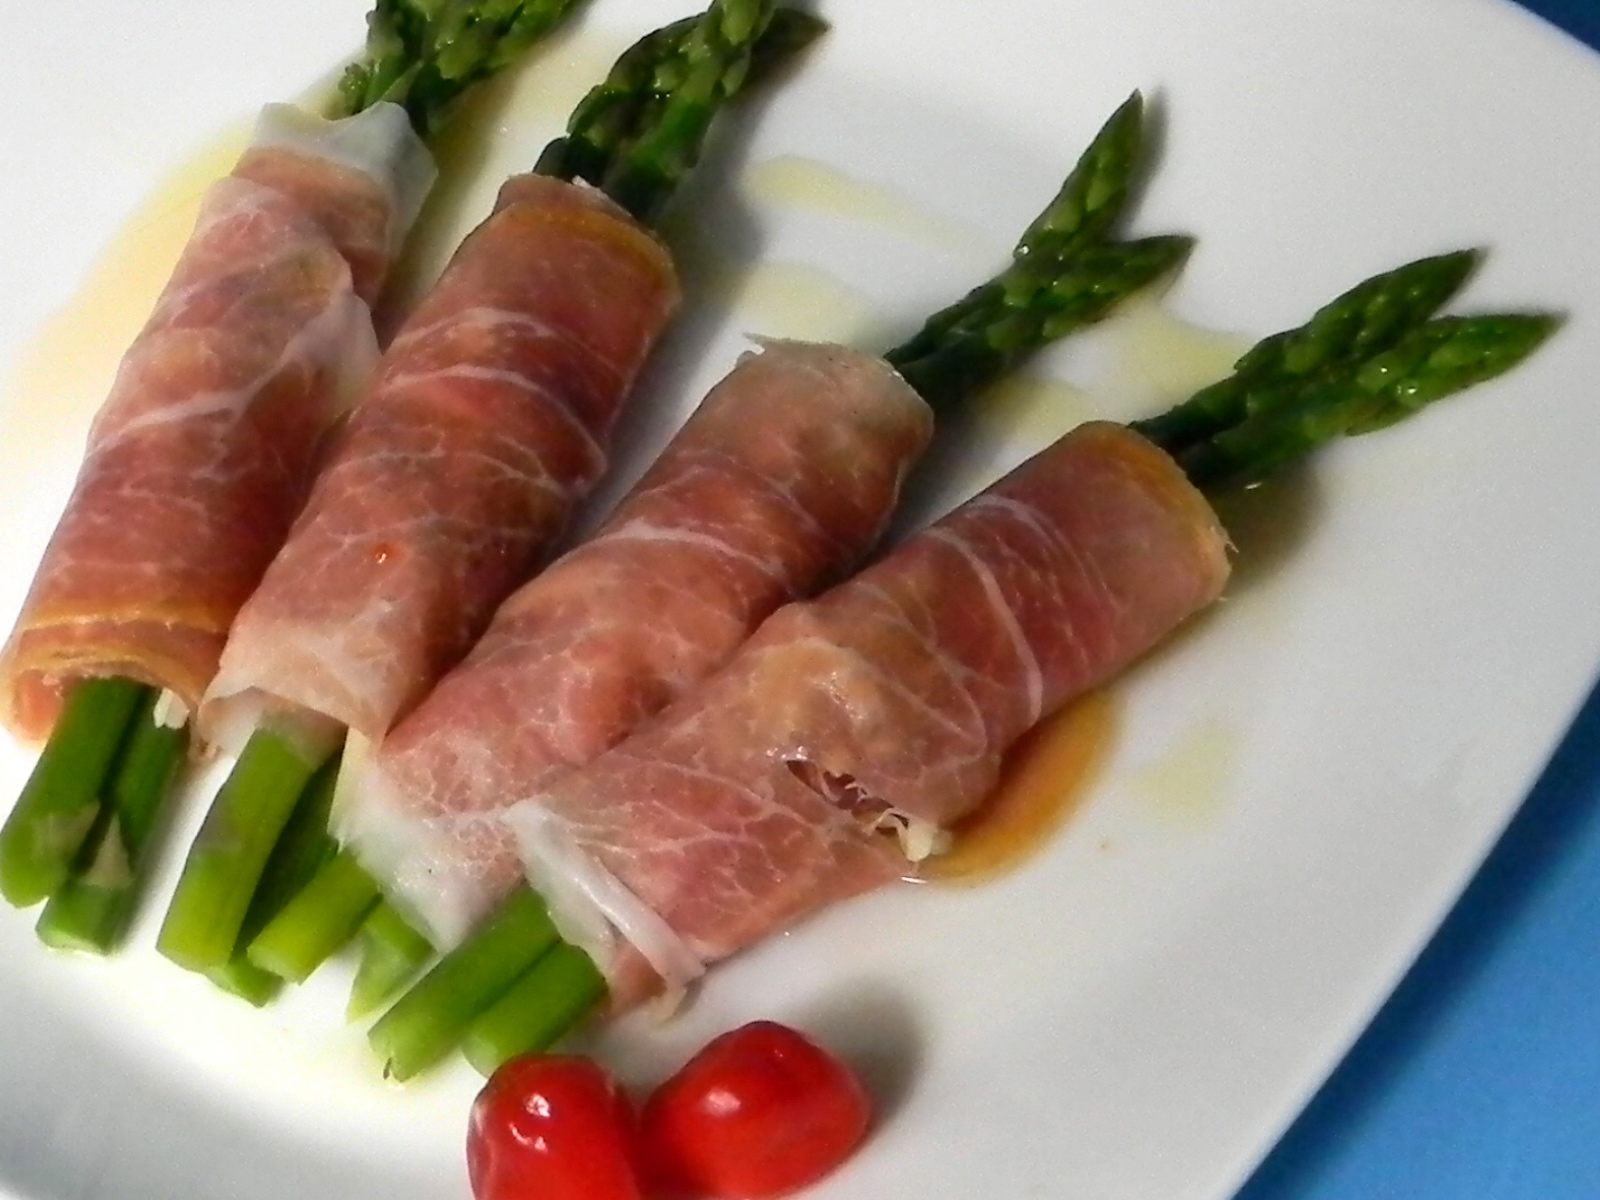
TV TRAY

As a single person, I sometimes (often?) take my meal to the living room and eat off a TV tray while watching a movie or documentary. TV tray meals are usually cobbled-together with whatever happens to be in the kitchen, no measurements recorded.

Proscuitto-wrapped asparagus, mild gruyere, basil & freshly ground black pepper; drizzled with EVOO. Pepperdews (tastes like a slightly sweet pickle at first bite, then a spicier bite kicks in).

Monday, January 28, 2013

Pear-Cranberry Pie


Yes, I’m enamored with cranberries and you will be, too, after you taste this Pear-Cranberry Pie. The sour flavor of the craberries combines beautifully with whatever sweetener you choose. And the color! Who can resist the bright, shiny reds of cranberries. No need to buy canned cranberries or canned cranberry sauce. It’s so easy to cook your own, starting with raw cranberries that can easily be stockpiled in your freezer.

Have you noticed the spot in the right-hand column that says “Looking for a recipe using a certain ingredient? Look here... ?” Well, type in ‘cranberry’ or ‘cranberries’ and you’ll find that Step by Step in the Kitchen already features several recipes using cranberries. Here’s one more to use up those cranberries in your freezer.

PEAR-CRANBERRY PIE
(serves 6-8)


Ingredients...

1/2-cup sugar
11 ounces frozen cranberries
3 tablespoons cornstarch
1/4-cup water
18 ounces Bosc pears
Juice from 1/2 lemon
1 tablespoon white granulated sugar
1-1/2 teaspoons cinnamon powder
1/2-cup chopped walnuts
2 tablespoons butter
double pie crust

Directions...
1. In a 2-quart saucepan, combine sugar, cranberries, cornstarch and water. Bring to a boil over medium heat, stirring constantly. Lower heat if necessary. Stir gently. Boil one minute or until thickened. Set aside to cool.

2. Wash, peel, core and slice pears. Stir in lemon juice. Cover and set aside. Can be refrigerated.

3. Prepare your pie crust. Using a cookie cutter or some other method, cut small designs in the top crust. Or, cut several slits in the top crust after the pie is assembled.

4. Spread thickened cranberry mixture in pie pan on top of bottom crust.

5. Arrange pears on top of cranberry mixture.

6. Sprinkle sugar-cinnamon mixture on top of pears and then sprinkle with walnuts.

7. Divide butter into eight pieces and place on top of pie.

8. Add and attach top crust. Place pie plate on a baking sheet covered with aluminum foil, in case of spillover. Tear off four strips of foil and attach to each other, end to end. Use to cover outer edge of pie crust.

9. Bake in preheated 450-degree Fahrenheit oven for 10 minutes. Lower heat to 350-degrees and bake 30 minutes more. Remove foil and bake approximately 30 minutes more until golden brown and the filling can be seen bubbling through the openings in the top crust.

I chose Bosc Pears for this pie. Brought them home from the supermarket and let them sit on the counter for several days to ripen. At that point, they were just as firm as when I bought them. Peeled, they are lovely with no blemishes. A melon-baller came in handy for removing the core (a grapefruit spoon will work just as well). Although the Bosc Pears were just mildly sweet, I chose not to add any sweetener other than the sugar-cinnamon mixture being sprinkled on top.


I have to declare this my favorite dessert and my favorite overall next to the Scallop and Salmon with a Cranberry and Nut Sauce.


Monday, November 21, 2011

HOLIDAY PIE CRUST PREP


I’m baking pies for Thanksgiving dinner at my daughter’s house. Another opportunity to use my Kitchen Aid stand mixer. This machine does big loads, so I tripled the recipe, using the ingredients and amounts listed in the Kitchen Aid book. The ingredients are what I’ve always used in pie crusts: flour, salt, shortening, butter and water. Sometimes I’ve used only shortening; other times only butter.

What I’m blogging about today is just the preparation of the pie pastry. Rolling out the pastry and assembling the pies will come later... maybe. Depends on how busy I get, and on what the crusts look like when I start rolling them out. Maybe I’ll take photos even if the pastry looks terrible after being rolled out. The nice thing about pie crusts is that most it is hidden and if not, can be easily patched and prettied.


Pie pastry, ingredients for two crusts...
2-1/4 cups all purpose flour
3/4 teaspoon salt
1/2 cup shortening, well chilled
2 tablespoons butter, well chilled
5-6 tablespoons ice water

Pie pastry, ingredients for six crusts...
6-3/4 cups all purpose flour
2-1/4 teaspoons salt
1-1/2 cups shortening, well chilled
6 tablespoons butter, well chilled
15-18 tablespoons ice water


Directions...
1. Measure flour and salt into large mixing bowl; whisk together. Cover and refrigerate.
2. Measure shortening; cover and refrigerate.
3. Measure butter; cut in small pieces and refrigerate.
4. Measure ice water and refrigerate.
5. Check refrigerated shortening after several hours (or let sit in refrigerator overnight). When hard enough, cut into small pieces. Place back in frig for at least one more hour.
6. Add cut-up shortening and butter to flour/salt mix. Combine quickly till shortening is size of small peas.
7. Add water 1 tablespoon at a time until pastry is moistened and dough begins to hold together.
8. Using your hands, quickly shape the dough so that it can be cut into equal amounts.


9. Pat each piece into a flat disc, wrap it in plastic wrap, then foil. (Keep pastry covered with a damp paper towel, taking out enough for one disc at a time.)


10. If using the same day, or the next, refrigerate. At this time, too, the packages can be placed in the freezer until you’re ready to use them.


Notice the references to “chill” and “refrigerate” throughout this piece? That’s because it’s important to keep the ingredients cold, before and after assembling them. That’s also why you have to work quickly.

I used my Kitchen Aid mixer and it worked so much better for the larger quantity of ingredients. Optional methods of mixing are to use a pastry blender or a couple of knives (works well with smaller amounts of pastry dough).

Six pastry discs are ready and chilling in my freezer. Three or four will go into this week’s baking and the rest will await my pleasure. Maybe Christmas pies?


******

Step by Step in the Kitchen is now on Facebook. Take a look and "Like" the page. I'll be posting extra notes and photos there.

and

Visit my other blog ~ Corning NY Step by Step, a pictorial view of the City of Corning NY.