Showing posts with label carrots. Show all posts
Thursday, October 10, 2013
Three Easy Meat And Veggie Meals Concocted With Whatever Happens To Be In The House
If I wait too long after creating a dish before blogging about it, it takes even longer to translate my notes about said dish. For instance, the nameless creation pictured next was hastily noted on a small piece of paper as ~
“Leafy Green lettuce, Smokey deli Turkey, Polar..., Grand Cru..., Spinach cooked.”
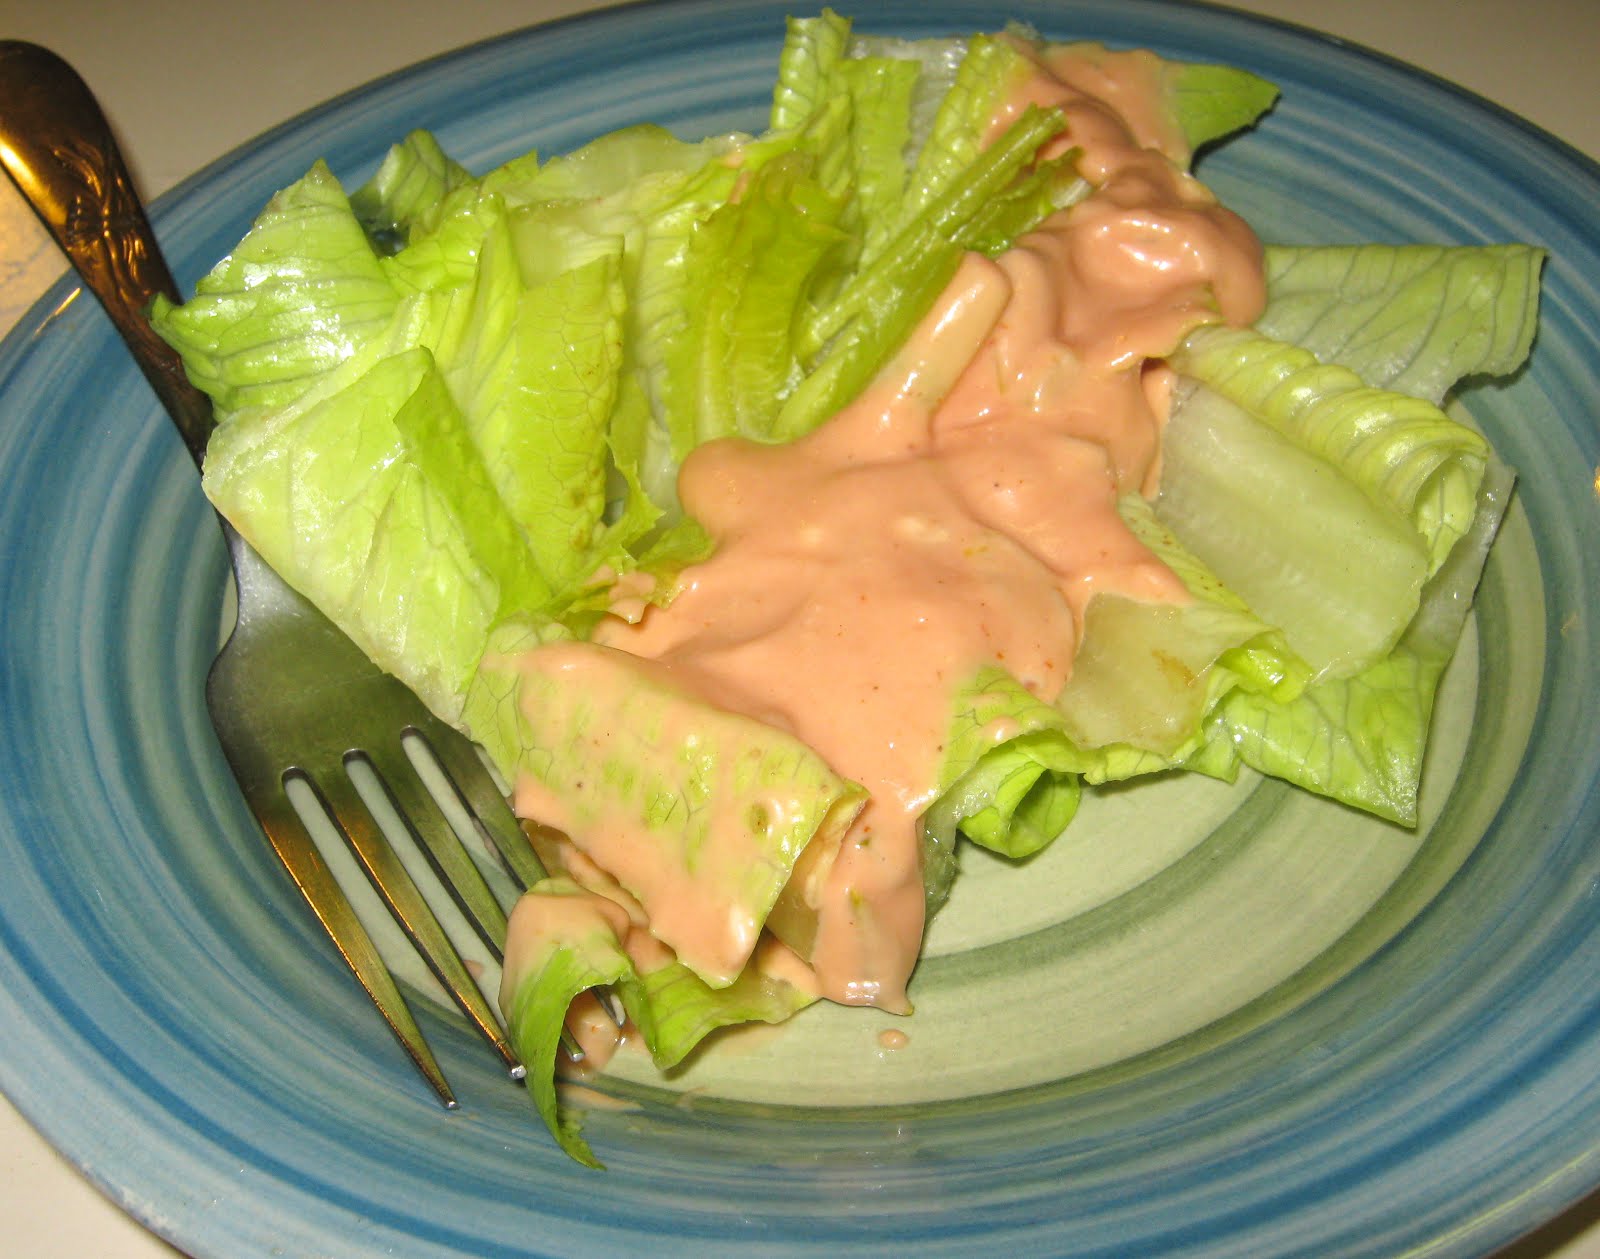
What it means is ~ I cleaned, dried and laid out individual leaves of Leafy Green Lettuce. Each leaf was topped with a slice of Smoked Deli Turkey, then drizzled with a stream of mild Polar Mango Sauce (easily replaced with any favorite sauce). Grand Cru is a version of Gruyere Cheese that is produced in the United States. A strip of it goes on next and the final ingredient is cooked spinach.
Really quite good and I liked picking the leaves up and eating them with my fingers.
******
Another note I came across, slightly more decipherable ~
“1 T. Scallions - Squirt EVOO, 1/2 c. Canned Beets, 10 stalks Asparagus, 1/4 c. Shredded Carrots, Spaghetti Squash 2 c., 1 T. Parmigiano Reggiano”
Here are the actual steps I took ~ First cooked a small spaghetti squash in the oven. After cooled slightly, cut in half and used a large fork to pull out the innards in spaghetti-like strands. Squirted a small amount of extra virgin olive oil in a medium casserole dish. Filled bottom with a layer of spaghetti squash; topped that with cut-up (leftover) cooked asparagus. Arranged canned beet slices around edges and scattered shredded carrots and small pieces of scallions (green onions) on top. Sprinkled with Parmigiano Reggiano.
Can’t remember whether I heated this one in the oven or in the microwave. Anyway, after it had time to heat, I sprinkled it with more Parmigiano Reggiano. Can never have too much cheese!
******
Lastly, and I’m lacking notes on this one, so will go with my memory and the photo ~
A bed of torn lettuce, topped with bite-sized pieces of cube steak (cooked and seasoned however you like it--I simply used Salt & Pepper), pineapple chunks, sliced cooking onion, shredded carrots (the pineapple, onion and carrots were cooked with the cube steak). To top it all off, Polar Mango Sauce.
Such fun to mix and match whatever is in my refrigerator and cupboards.
Wednesday, April 10, 2013
Mango Chutney-Cranberry Muffins
I’ve become addicted to mango chutney ever since I bought it for South African Bobotie. Now you can always find a jar of chutney in my refrigerator and chutney in my muffins.
I’m also addicted to muffins and have used the same recipe for years, mixing things up by adding blueberries, chocolate chips, cranberries, craisins, nuts and numerous other special ingredients. There’s never been a ‘fail’ -- every addition is better than the one before.
At the time of my most recent craving for muffins, I was really at a loss--having only cranberries on hand yet wanting to kick the taste up a notch. That’s when I thought of the jar of mango chutney (mild version) in my refrigerator.
Combined with raw cranberries from the freezer, the mango chutney helped me to create a new all-time favorite. I’m a mild-heat sort of gal, but if you like it spicier and have that on hand, I say ‘go for it’!
My first tasting is always straight from the oven. Hot, yummy muffins! Let me tell you, hot (warm) chutney has quite a kick to it. After they cool, however, the spiciness of the chutney tones down to a perfect level of heat.
MANGO CHUTNEY-CRANBERRY MUFFINS
(makes 12)
Ingredients...
3/4-cup all-purpose (white) flour
3/4-cup whole wheat flour
3/4-cup brown sugar
1 tsp. baking soda
1 tsp. baking powder
1/4-tsp. salt
2/3-cup milk (I use skim)
1/4-cup vegetable oil
1 whole egg
1 cup whole raw cranberries
1/3-cup mild mango chutney
Directions...
1. Mix dry ingredients, using fingers if necessary
2. Combine liquid ingredients.
3. Stir dry and liquid ingredients together until all dry ingredients are wet. (Do not over-beat)
4. Fold in cranberries.
5. Pour into prepared muffin tin (oil/grease/butter).
6. Use back of a spoon to put a dip in the center top of each unbaked muffin, and then fill with heaping teaspoonful of chutney.
7. Bake in preheated 350-degree Fahrenheit oven for 25-35 minutes. (As a general rule, muffin baking time depends on what extra ingredients have been added.)
I'm already wondering what these same muffins would taste like with the cranberries replaced by fresh cut-up mangos!
***********
TV TRAY
As a single person, I sometimes (often?) take my meal to the living room and eat off a TV tray while watching a movie or documentary. TV tray meals are usually cobbled-together with whatever happens to be in the kitchen, no measurements recorded.
Whole wheat pasta ~ Oven-roasted green cabbage, tomatoes, carrots and celery (seasoned with EVOO, salt and pepper, basil and garlic powder).
Friday, January 25, 2013
Bare Cupboard Soup
Bare Cupboard Soup, based solely on what I had available in my cupboards and refrigerator-- and the whims of my tastebuds-- was the perfect ending to a chilly New York State day.
BARE CUPBOARD SOUP
(2 servings)
Ingredients...
1 tablespoon oil
1 small carrot, diced
1 stalk celery, diced
A pinch each of salt, pepper, onion powder, dried oregano, dried parsley, crushed red pepper flakes
1/2 large (6 grams) beef, chick or vegetable bouillon cube
1 cup water
1-ounce tomato paste
6-ounces water
15.5-ounce can great northern beans
Directions...
1. In a 2-quart saucepan, sauté carrots and celery in oil for approximately 5 minutes.
2. Measure salt, pepper, onion powder, oregano, parsley and crushed red pepper into a small dish. Add 1/2 bouillon cube, crushed. Add to saucepan all at once.
3. Stir in 1 cup water, tomato paste and 6-ounces water (measured in tomato paste can).
4. Raise heat slightly and cook 8-10 minutes.
5. Stir in great northern beans and heat about 5 minutes more until beans are hot.
What happened to the remaining 5 ounces of tomato paste, you ask? I laid out a small square of wax paper on a small plate. Divided the remaining paste into 5 “plops” and set it in the freezer. Once frozen, I placed it in a small freezer bag, ready to pull out whenever I need more.
While in the freezer, a quick look reminded me that the cupboards are not quite so bare as I thought. There’s a couple of turkey-olive burgers left, a half pound of bacon, and vegetable soup I made last week.
BARE CUPBOARD SOUP
(2 servings)
Ingredients...
1 tablespoon oil
1 small carrot, diced
1 stalk celery, diced
A pinch each of salt, pepper, onion powder, dried oregano, dried parsley, crushed red pepper flakes
1/2 large (6 grams) beef, chick or vegetable bouillon cube
1 cup water
1-ounce tomato paste
6-ounces water
15.5-ounce can great northern beans
Directions...
1. In a 2-quart saucepan, sauté carrots and celery in oil for approximately 5 minutes.
2. Measure salt, pepper, onion powder, oregano, parsley and crushed red pepper into a small dish. Add 1/2 bouillon cube, crushed. Add to saucepan all at once.
3. Stir in 1 cup water, tomato paste and 6-ounces water (measured in tomato paste can).
4. Raise heat slightly and cook 8-10 minutes.
5. Stir in great northern beans and heat about 5 minutes more until beans are hot.
What happened to the remaining 5 ounces of tomato paste, you ask? I laid out a small square of wax paper on a small plate. Divided the remaining paste into 5 “plops” and set it in the freezer. Once frozen, I placed it in a small freezer bag, ready to pull out whenever I need more.
While in the freezer, a quick look reminded me that the cupboards are not quite so bare as I thought. There’s a couple of turkey-olive burgers left, a half pound of bacon, and vegetable soup I made last week.
Saturday, November 10, 2012
Gruyére-Stuffed Baked Potatoes
What wouldn’t you give for an fairly inexpensive, healthy and absolutely delish food that would please every eater! Something that requires the least bit of preparation.
Eat with a fork or your fingers. Yep, Gruyére-Stuffed Baked Potatoes are finger-licking good. Even your diehard meat eaters will be asking for seconds.
The basic requirements for Gruyére-Stuffed Baked Potatoes are
* baking potatoes
* vegetables, washed, cut up and lightly sauted
* any cheese, shredded. (I chose to use Gruyére, so I got to name the recipe!)
Step 1 - Lightly grease potatoes, wrap individually in foil and bake in a 450-degree Fahrenheit oven for 45-50 minutes.
Step 2 - While the potatoes are baking, cut up vegetables and just barely cook in a pan on the stovetop. I cook them all together in one pan, starting with the ones that take longest to cook. When they are almost done, I add the others. Season with kosher salt and freshly ground pepper.
Step 3 - When potatoes can be easily pierced with a paring knife, remove from oven using pot holders. Leave oven turned on. Place each potato on a dish to see how it “sits”, then cut off a long piece from the top. Scoop out the potato, leaving enough so it can hold its shape.
Step 4 - Mash potatoes with masher or fork. Mix with salt and pepper to taste, plus oil or butter, till preferred consistency. I mix in EVOO and nutritional yeast for a buttery taste. Gently mix in the vegetables and shredded cheese of your choice and scoop the mixture back into the potatoes, piling it high.
Step 5 - Turn oven to broil. Place potatoes in broiler proof pan. Broil 3-5 minutes, or whatever it takes to brown the tops.
For each potato (approximately 10 ounces, or 300 grams, each), I used 1/4 cup small pieces broccoli, 4 halved snow peas, 2 tablespoons shredded carrots and a heaping 1/4 cup of shredded Gruyére cheese. That also allowed me to stuff the tops (remember those strips I cut off the top of the potatoes?).
The Gruyére is pricy, but so-o delicious! According to Dictionary.com, Gruyére is a firm, tangy cheese, named after Gruyére, a district in Switzerland, where it was first made.
My strategy when shopping for ingredients for any recipe requiring cheese is to ask my supermarket for a taste of the cheese. Sometimes I get other recommendations after stating how I’ll be using it. I listen to my knowledgeable “cheese person” very carefully.
Eat with a fork or your fingers. Yep, Gruyére-Stuffed Baked Potatoes are finger-licking good. Even your diehard meat eaters will be asking for seconds.
The basic requirements for Gruyére-Stuffed Baked Potatoes are
* baking potatoes
* vegetables, washed, cut up and lightly sauted
* any cheese, shredded. (I chose to use Gruyére, so I got to name the recipe!)
Step 1 - Lightly grease potatoes, wrap individually in foil and bake in a 450-degree Fahrenheit oven for 45-50 minutes.
Step 2 - While the potatoes are baking, cut up vegetables and just barely cook in a pan on the stovetop. I cook them all together in one pan, starting with the ones that take longest to cook. When they are almost done, I add the others. Season with kosher salt and freshly ground pepper.
Step 3 - When potatoes can be easily pierced with a paring knife, remove from oven using pot holders. Leave oven turned on. Place each potato on a dish to see how it “sits”, then cut off a long piece from the top. Scoop out the potato, leaving enough so it can hold its shape.
Step 4 - Mash potatoes with masher or fork. Mix with salt and pepper to taste, plus oil or butter, till preferred consistency. I mix in EVOO and nutritional yeast for a buttery taste. Gently mix in the vegetables and shredded cheese of your choice and scoop the mixture back into the potatoes, piling it high.
Step 5 - Turn oven to broil. Place potatoes in broiler proof pan. Broil 3-5 minutes, or whatever it takes to brown the tops.
For each potato (approximately 10 ounces, or 300 grams, each), I used 1/4 cup small pieces broccoli, 4 halved snow peas, 2 tablespoons shredded carrots and a heaping 1/4 cup of shredded Gruyére cheese. That also allowed me to stuff the tops (remember those strips I cut off the top of the potatoes?).
The Gruyére is pricy, but so-o delicious! According to Dictionary.com, Gruyére is a firm, tangy cheese, named after Gruyére, a district in Switzerland, where it was first made.
My strategy when shopping for ingredients for any recipe requiring cheese is to ask my supermarket for a taste of the cheese. Sometimes I get other recommendations after stating how I’ll be using it. I listen to my knowledgeable “cheese person” very carefully.
Friday, September 28, 2012
Old-Fashioned Velveeta Macaroni and Cheese Plus Homemade Thousand Island Dressing
The ice cream picture got your attention, didn’t it! More about that later, but right now I want to share some 1950’s food history from my house, the one I lived in as a child.
When I was a kid, we ate meatloaf and casseroles weeknights. On weekends, Sundays in particular, we indulged in an inexpensive cut of beef or a whole roasting chicken baked in the oven while we were at church. Accompanying each meal was potatoes, mashed or simply cut up and boiled, plus a can of vegetables, usually peas or carrots, often peas and carrots mixed.
Mom’s cooking. Comfort foods.
Most of all there was Velveeta Macaroni and Cheese.
VELVEETA MACARONI AND CHEESE
Ingredients...
2 cups cooked elbow macaroni (1-1/2 cups or less of dry pasta)
1/4 cup butter, divided (3 T./1 T.)
1/4 cup flour, all purpose or whole wheat
1 cup milk (I used skim because it’s what I have in the refrigerator)
1/2-pound (8 oz.) Velveeta, a "Pasteurized Prepared Cheese Product”
6 Ritz crackers, crushed
Directions...
1. Melt 3 tablespoons of butter over medium heat.
2. Stir in flour with a whisk or a fork. Stir 2-3 minutes.
3. Gradually stir in milk and continuing stirring until boils and thickens.
4. Add cheese cubes and stir till melted.
5. Melt 1 tablespoon butter in microwave (10-15 seconds). Mix in cracker crumbs.
6. Pour mac and cheese mixture into oiled or butter casserole dish and top with cracker mixture.
7. Bake in preheated 350-degree Fahrenheit oven 20 minutes, or until bubbly.
The Velveeta makes this a very salty dish, so there is absolutely no need to use additional salt.
As an adult, I’ve wondered why we didn’t eat salads in my childhood home. One day it came to me, that was back in the days of Iceberg Lettuce. I can see it now. Each of us had a small salad plate with a big wedge of iceberg topped with a generous helping of Homemade Thousand Island Dressing.
I will NOT eat iceberg now ~ dull taste and no nutritional value ~ so the lettuces you're seeing pictured here are Romaine and Leafy Green.
THOUSAND ISLAND DRESSING
Mix...
1/2 cup mayonnaise
1/4 cup (or less) ketchup
1-2 T. pickle relish
As usual, I was missing an ingredient. In this case, it was the relish, so I substituted two (2) Kosher dill pickle slices, finely chopped.
Moving back to the present, here in 2012, I’ve discovered a wonderful recipe from Bam’s Kitchen. There are just four ingredients in Bam’s Orange-Coconut-Cardamon Ice Lollies and they truly do melt in your mouth! While you’re in Bam’s Kitchen getting this recipe, cruise around and see what else catches your fancy.
Instead of popsicle molds, I used 5 ounce Dixie cups. And, in place of popsicle sticks, I used colorful plastic kids utensils.
I used a photo of ice cream to get your attention. It worked, didn’t it! For the first time ever, I bought a container of “shell”, the chocolate (in this case, chocolate-peanut butter) that you pour on something frozen like ice cream and it freeze, too.
Vanilla ice-cream, chocolate-peanut butter shell and candy sprinkles. It even looks appealing in black and white.
When I was a kid, we ate meatloaf and casseroles weeknights. On weekends, Sundays in particular, we indulged in an inexpensive cut of beef or a whole roasting chicken baked in the oven while we were at church. Accompanying each meal was potatoes, mashed or simply cut up and boiled, plus a can of vegetables, usually peas or carrots, often peas and carrots mixed.
Mom’s cooking. Comfort foods.
Most of all there was Velveeta Macaroni and Cheese.
VELVEETA MACARONI AND CHEESE
Ingredients...
2 cups cooked elbow macaroni (1-1/2 cups or less of dry pasta)
1/4 cup butter, divided (3 T./1 T.)
1/4 cup flour, all purpose or whole wheat
1 cup milk (I used skim because it’s what I have in the refrigerator)
1/2-pound (8 oz.) Velveeta, a "Pasteurized Prepared Cheese Product”
6 Ritz crackers, crushed
Directions...
1. Melt 3 tablespoons of butter over medium heat.
2. Stir in flour with a whisk or a fork. Stir 2-3 minutes.
3. Gradually stir in milk and continuing stirring until boils and thickens.
4. Add cheese cubes and stir till melted.
5. Melt 1 tablespoon butter in microwave (10-15 seconds). Mix in cracker crumbs.
6. Pour mac and cheese mixture into oiled or butter casserole dish and top with cracker mixture.
7. Bake in preheated 350-degree Fahrenheit oven 20 minutes, or until bubbly.
The Velveeta makes this a very salty dish, so there is absolutely no need to use additional salt.
As an adult, I’ve wondered why we didn’t eat salads in my childhood home. One day it came to me, that was back in the days of Iceberg Lettuce. I can see it now. Each of us had a small salad plate with a big wedge of iceberg topped with a generous helping of Homemade Thousand Island Dressing.
I will NOT eat iceberg now ~ dull taste and no nutritional value ~ so the lettuces you're seeing pictured here are Romaine and Leafy Green.
THOUSAND ISLAND DRESSING
Mix...
1/2 cup mayonnaise
1/4 cup (or less) ketchup
1-2 T. pickle relish
As usual, I was missing an ingredient. In this case, it was the relish, so I substituted two (2) Kosher dill pickle slices, finely chopped.
Moving back to the present, here in 2012, I’ve discovered a wonderful recipe from Bam’s Kitchen. There are just four ingredients in Bam’s Orange-Coconut-Cardamon Ice Lollies and they truly do melt in your mouth! While you’re in Bam’s Kitchen getting this recipe, cruise around and see what else catches your fancy.
Instead of popsicle molds, I used 5 ounce Dixie cups. And, in place of popsicle sticks, I used colorful plastic kids utensils.
I used a photo of ice cream to get your attention. It worked, didn’t it! For the first time ever, I bought a container of “shell”, the chocolate (in this case, chocolate-peanut butter) that you pour on something frozen like ice cream and it freeze, too.
Vanilla ice-cream, chocolate-peanut butter shell and candy sprinkles. It even looks appealing in black and white.
Labels:
candy sprinkles,
cardamom,
carrots,
coconut milk,
ice cream,
iceberg lettuce,
lettuce,
lollies,
macaroni and cheese,
magic shell,
oranges,
peas,
popsicles,
Thousand Island dressing,
Velveeta
Monday, April 2, 2012
Veggie Cheese Roll-ups
In the mid-90s I worked for a few years at a small cafe where we made everything from scratch. My one and only period in the food business, and what an amazing experience it was. I learned to make Cucumber-Dill Salad Dressing, homemade breads, the best peanut butter cookies in the world, and today’s feature, Veggie Cheese Roll-ups.
These roll-ups are not for the faint-hearted. Although packed with veggies and rolled up in a whole wheat bread dough, they are loaded with full-fat, cholesterol-laden sharp cheddar cheese.
If you’ve got the time, and the inclination, these are a treasure worth whipping up. I don’t make them often. My daughter insists I supply her with lots of them after she gives birth, so it may be that it’s been at least five years*, and four years before that. I really can’t remember, but I’ll never forget the recipe. Kind of like riding a bicycle; it really sticks in my mind. (*Spoke with my daughter and she reminded me this is the first time the youngest has eaten a Veggie Cheese Roll-up.)
You can use your favorite bread dough, even the store-bought kind, or you can use the recipe I’m going to share with you. My dough combines whole wheat and white flours. Oh, by the way, this is the first time I’ve made the dough since I bought my Kitchen Aid mixer. Love, love, love it... Now that I have a little arthritis in my fingers, having a mixer with a dough hook makes such a difference.
If you, however, have strong healthy fingers, knead the dough by hand. It’s like washing dishes by hand. Time consuming, yes, but you can put on some music--as fast or as slow as you like--and empty your mind of all those nagging problems. Just enjoy the moment and the repetitive motions.
I’ve made a discovery about taking food photos indoors (at least indoors at my place). I have to use the flash. I’ll leave it to you to guess which photos were taken with a flash. Hint ~ the color is so much more authentic, not so creamy or yellowy. To truly appreciate the detail of photos on this and other blogs, you can click on each photo to see an enlarged version.
The bread dough recipe makes two loaves, and it will make a huge pan of Veggie Cheese Roll-ups. I used two smaller (approx. 9x11) pans since I have a small stove/oven; fifteen roll-ups to a pan. So, figure on about 30 rolls, each cut about an inch thick before baking.
Bread Dough
(enough for approximately 30 Veggie Cheese Roll-ups or 2 loaves of bread)
Ingredients...
3 cups lukewarm water
2 tablespoons active dry yeast (2 envelopes)
2 teaspoons salt
4 tablespoons extra virgin olive oil (EVOO)
1-1/2 cups whole wheat flour (or whole wheat bread flour)
4 cups all-purpose white flour (or a mix of white and whole wheat)
Directions...
1. Stir together water, yeast, salt, EVOO and 1-1/2 cups whole wheat flour.
2. Cover and let rest on counter at least 20 minutes.
3. Stir in more flour. The 4 cups is an approximation.
4. Knead by hand or machine until smooth.
5. Place dough ball in large greased bowl. Roll around till entire ball has been greased.
6. Cover and let rise in warm place 30-45 minutes.
7. Punch down and let rest 5-6 minutes on a floured surface. (continues below with 8.)
Filling
Ingredients...
2 tablespoons EVOO
3/4 - 1 cup diced onion
10 oz. matchstix carrots
1-pound broccoli crowns, chopped
Garlic powder
Salt & Pepper
1-pound sharp cheddar cheese,shredded
Directions...
1. Combine all filling ingredients except cheese in large pan and cook over medium heat until cooked to desired tenderness.
2. Start off with small amounts of garlic powder (1/2-1 teaspoon) and S&P, then taste when nearing end of cooking. Add more garlic powder, S&P, according to your taste buds.
3. Remove from burner when done and pour into large pan to cool.
Making the Veggie Cheese Roll-ups
8. Starting from Step 7 above, flatten dough ball on floured surface.
9. Roll out in rectangle that is more long than wide.
10. Spread cooled filling on dough, stopping about 1-inch away from the two longer sides. Scatter the shredded/grated cheese the same way.
11. Roll up the dough and filling so that you end up with a very long roll. Gently stretch and pat to create a roll that is uniformly sized in all parts.
12. Cut into 1-inch sections and place side-by-side in greased pan(s).
13. Bake 35-45 minutes in pre-heated 350-degree Fahrenheit oven. Roll-ups should look well done.
About the onions ~
Use your favorite onion, about 3/4-1 cup. Since I left the dough rising on the counter while I walked to the store for the veggies, I took the easy way out and bought a package of diced onions in the produce section.
About the broccoli ~
Three-quarters of a pound of fresh broccoli crowns did it for me this time. I cut away the thickest part of the stems and chopped up the rest. An alternative is to use thawed 10 oz. packages of frozen broccoli.
About the carrots ~
A 10-ounce bag of shredded carrots did the trick this time. I usually shred them myself, but as I said, I was in a time crunch.
About the cheddar cheese ~
I used one pound of sharp cheddar cheese. I say, the sharper the better and I prefer to shred it myself.
Veggie Cheese Roll-ups freeze well and can be re-heated in a toaster oven. Microwave a cold roll-up for thirty seconds in a microwave.
******
Step by Step in the Kitchen is on Facebook. Take a look and "Like" the page.
******
I really love to hear from readers, to know what you think of my blog and my recipes.
Thursday, January 26, 2012
Halwa Gajar
Thali, a local restaurant here in Corning NY, serves a delicious carrot dessert, Halwa Gajar, or Gaajar Kaa Halwaa, popular in North India. When they had their luncheon buffet, I would always end my meal with Halwa Gajar. I liked it so much that I searched the Internet, and this is the mixture I came up with that’s closest to Thali’s dessert.
Only seven ingredients (and two of them are optional, but really add to the taste and texture). Don’t you just love recipes that call for so few ingredients!
HALWAY GAJAR
Ingredients...
1-pound shredded carrots
Heaping tablespoon coconut oil (or ghee)
5 tablespoons granulated white sugar
1/2 cup coconut milk (can substitute evaporated or sweetened condensed milk)
4 cardamom pods*
Optional: a handful each of raisins and pistachios (you choose the size handful)
Directions...
1. Saute the shredded carrots in oil or ghee.
2. Stir in sugar. Continue cooking over low heat, stirring often, until sugar melts and paste thickens.
3. Add cardamom and milk. Cook over low heat and stir occasionally until thickens.
4. Add raisins and nuts when ready to serve, warm or chilled.
A few special notes about this recipe:
* Yes, you can “heap” coconut oil because it comes in a slightly solid state.
* I use a small mortar and pestle set to crush the cardamom pods open. Remove the broken pieces of pod and then crush the black seeds. Do not remove the seed shells at this point; just pour it all into the mixture.
* If you shred your carrots by hand, like I do, don’t bother with the last couple of inches. Save your fingers! Slice those ends, steam them, add a bit of butter and/or olive oil, kosher salt and freshly ground black pepper.
When you eat your Halwa Gajar, be prepared for a very sweet taste, one that will lure you back for more. Carrots on their own are sweet, but add milk and granulated white sugar. Oh, and did I mention raisins--aka grapes--which are loaded with sugar?
******
Step by Step in the Kitchen is now on Facebook. Take a look and "Like" the page. I'll be posting extra notes and photos there.
Subscribe to:
Posts (Atom)